How to Faux Paint a Wall
Faux painting involves applying different glazes to a wall in order to give it the look of a weathered, textured surface. Common faux paints include marble, brick, and wood. A common alternative to paint, faux paint allows one to vary the consistency of a wall’s color and texture while giving the illusion of having a much more expensive material. There are three common techniques for faux painting. Color wash includes a glaze applied in overlapping brush strokes to produce a worn appearance. Sponging involves using a sponge to apply glaze for a more textured look. Ragging includes the use of a rag or towel to give the wall a milder, more variable style. The preparation for all of these methods is the same.
Choosing a Faux Painting Technique
Decide whether you want a smoother or a more worn look.
Ragging generally gives the smoothest texture. Color wash gives the most worn look, while sponging gives a very textured appearance.
Decide how many coats of paint you want.
The more paint you add to your surface, the more textured the surface will appear. A single coat leaves brush or rag marks on the wall, while a second coat will mostly cover these and provide a more even appearance.
Choosing Faux Paint and Materials
Pick a color for your faux paint.
Look at paint samples in a store to see how paint will appear when applied. You can tweak the brightness of the paint by adding a light or darker base coat, and you can also mix two colors to create different tones.
Purchase your faux paint and painting materials.
Buy the paint, base coat, and other materials–a brush, rag, or sponge, as well spackling paste for filling irregularities in the wall–at a paint or home supply store. Consult sales staff to make sure you are buying the right colors for your faux paint and base coat.
Faux Finishes You Can Do Yourself
Faux Malachite
You mean we’re NOT looking at a table made from crystallized minerals? To make this stunning faux finish, paint a base layer in a bright green mint or teal color. Then, with different shades of darker teal (each in a mixture of one part paint to three parts glaze), use brushes of varying size to create rock-like swirls, layering them slightly over each other.
Faux Marble
I know what you’re thinking—you can’t tell the difference between the real marble and the imitation! With nothing but a feather and three different shades of gray craft paint, the blogger at In My Own Style made her countertop look like actual marble.
Faux Bois
Want to pretend your laminate shelf is actually wood? Well, the Little Green Notebook has got you covered. Once you paint your base color, mix the color of your grain using one part oil-based paint to one part thinner or Penetrol. Paint your surface in sections, then use a wood-grain rocker to form the grain. Make sure to vary your technique to imitate the variations found in a real wood surface.
Faux Exposed Brick
Want some brick where you’ve got none? Well, if you’re up for a bigger undertaking, you—like the intrepid weekend warrior at Do-It-YourselfDesign—can DIY it! Measure and tape the outline for your “bricks” on your wall, then cover with interior stucco. When the stucco is dry to the touch but still soft, remove the tape. Once the wall is completely dry, paint it white and your room will look like it belongs in a NYC brownstone!

Graining.
With faux bois being a recent hot trend in interiors, graining might be the way to go in faux finishes. Purchase a graining tool (specially designed for creating a wood-grain finish), then drag it gently down or across a wet glazed or painted surface. Be sure to rock the graining tool as you go in random, varied spots, to mimic the natural course of wood grain.
Sponging.
The use of a sponge in faux painting has been around for years; it’s a staple in the faux finishing world. Lightly dip a dry sponge into the paint and gently push it onto the surface you’re working with. The key to sponging is to do multiple layers, each very light, to build up to the color density you’re after. You want the sponged colors to be as even as possible across the entire surface. Consider using slightly different shades of the same color for a subtle depth in your finished faux surface.
Stripes:
Stripes are a classic design element that can add interest to any room. Adding stripes to your walls with paint is a technique that gives you the freedom to create original, personalized vertical or horizontal patterns that reflect your taste and lets you customize the colors to match your décor.
Plan out your design — do you want vertical or horizontal stripes? Do you want to paint them on an accent wall or throughout the whole room, or something else outside the box? Choose a color scheme. It’s common to choose two shades of the same color, but you don’t have to limit yourself. For a bolder effect, try contrasting colors that complement one another. For a more subtle striping effect, use the same color for the basecoat and the stripes, but in different finishes. You can be more contemporary by using stripes in varying widths.
Creative Faux Finish Ideas for your Bare Walls
Get inspired by your most loved fabrics and materials
Whether you love the rough appeal of burlap and seagrass or the ultra smoothness of leather and suede, there are many painting techniques to transform your wall. First find fabrics and textiles that evoke an emotion in you that you’d love to carry onto your walls. Depending on your design style, try out a small area first before painting the entire wall!
Using your ceiling to add gorgeous faux finishes
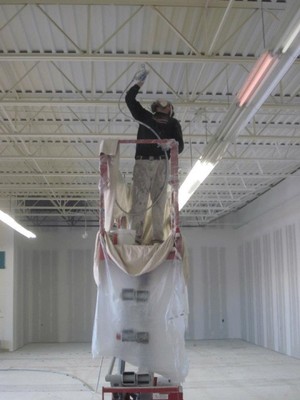
Your ceiling or 5th wall as it is referred to by designers is one of the best places to apply faux finish techniques. Your ceiling is often a missed opportunity to add color, texture and to transform a boring white painted ceiling into a whole other world! When choosing the technique that best fits your decor remember for do it yourself painting to use scaffolding or other safety equipment when applying paint.
Old world style to your modern home
Do you love the appeal of the Mediterranean to your interiors? Try faux finish techniques from distressing, graining, and layering or sponging on a variety of colors to add depth and to age your walls. This technique is perfect for interiors that want to bring a Tuscan or aged “patina” look to their interiors. This technique is common on ceilings in dining rooms and master bedrooms.
Using plaster to bring a rustic appearance to your room
In many European homes and even early Americana homes, plaster was the material of choice for interior walls as it was durable and could be given many different surfaces. Today, drywall is the finish of choice for most interiors, but if you love the rustic appeal of plaster try using a special primer paint and plaster faux finish sold at most paint stores. Perfect for light switch and electrical plates too!
