Category Archives: Home Inspection

How To Become An Electrician In Your Area

The Complete Guide to Electrical Wiring

Understanding Electrical Circuits

An electrical circuit is a continuous loop. Household circuits carry electricity from the main service panel, throughout the house, and back to the main service panel. Several switches, receptacles, light fixtures, or appliances may be connected to a single circuit.

Hot wires are black or red, and neutral wires are white or light gray. For safety, all modern circuits include a bare copper or green insulated grounding wire. The grounding wire conducts current in the event of a ground fault and helps reduce the chance of severe electrical shock.

The service panel also has a bonding wire connected to a metal water pipe and a grounding wire connected to a metal grounding rod, buried underground, or to another type of grounding electrode.

If a circuit carries too much current, it can overload. A fuse or a circuit breaker protects each circuit in case of overloads. Current returns to the service panel along a neutral circuit wire. Current then leaves the house on a large neutral service wire that returns it to the utility transformer.

Grounding and Polarization

Electricity always seeks to return to its source and complete a continuous circuit. Contrary to popular belief, electricity will take all available return paths to its source, not just the path of lowest resistance.

The Electrician’s Guide to IET Wiring Regulations

For more than 30 years, students and practising electricians have relied to guide them through the complexities of the Wiring Regulations. His Guide is a recognised brand and has consistently been a bestseller with a 4/5 star review over the years. Unlike other publications, it does not assume that readers are fully conversant with electrical theory. It assumes just a basic knowledge and introduces technical matter with brief easy-to-understand explanations.

This 4th Edition covers Amendment 3:2015, regarded as ‘potentially life-saving’, which takes effect July 2015. Changes such as in auxiliary circuits, earth fault loop impedances for protective devices, surge protection and outdoor lighting are all covered in simple and practical terms. Furthermore, up-to-date terminology has been introduced and chapters organised to correspond to the Regs, making it easier to follow.

Most importantly, the Guide benefits from the hands-on expertise provided by the co-author, whose credentials are second-to-none. He has taught electrical installation in industry, in FE establishments and in the private sector.

As in earlier editions, all useful relevant details derived from other IET publications such as Guidance Notes, Wiring Matters, which might otherwise be overlooked by electricians, are included.

The authors also understand that many readers might be sole traders, and so they spell out the financial implications and suggest money saving action wherever possible.

Electrician Qualifications: A Guide for Beginners

But there’s a problem: you’ve been looking at the various training courses that are available for budding electricians, and each one seems to result in a different qualification. Now you’re wondering which of those certificates and diplomas you actually need – which one will mark you out as a qualified electrician and enable you to turn professional?

Thing is, the world of electrical work is a rich tapestry, comprising lots of different tasks in lots of different places. There are lots of different electrician qualifications because there are lots of different electricians – some specialise in domestic installations, while others work exclusively in commercial/industrial environments. Some make a living from portable appliance testing (PAT), while others spend their days designing and installing complex electrical systems.

Basic Electrician Qualifications

Let’s start with the qualifications that are included on our Essential Electrician Course. This a great course for beginners, consisting of three crucial electrical qualifications that just about all electrical engineers are expected to hold:

Part P Domestic Installer – The Part P qualification allows you to install, inspect, test and certify a broad range of domestic electrical systems. Along with the 17th Edition certificate (see below), Part P is widely recognised as the essential qualification for new electricians.

17th Edition Wiring Regulations – The phrase ’17th Edition’ refers to the current Wiring Regulations to which electricians must adhere. Gaining your 17th Edition certificate demonstrates that you have a good understanding of the Regulations and how to comply with them.

Building Regulations for Electrical Installations in Dwellings – The Building Regulations are another important piece of legislation for electricians. Obtaining this qualification demonstrates that you understand the Building Regulations as applicable to electrical installations in homes and dwellings.

Going Further: Advanced Electrician Qualifications

Once you have earned the above qualifications, you may wish to work towards obtaining additional qualifications so as to set yourself apart from the competition and broaden the range of jobs you’re capable of undertaking.

How Much Does It Cost To Hire An Electrician?

Electrician Hourly Rates & Costs

Electricians usually charge between $50 to $100 per hour. Most homeowners pay a typical range between $161 and $522 for an electrician to visit their home and complete electrical repairs. Both hourly and project rates vary depending on the type of project, license and experience of the service provider.

Frustrated by the lack of outlets when your cell phone, laptop or pad starts to die? Want to install a dimmer, fix a light or upgrade your home’s security? Old electrical systems often can’t keep up. Because smart homes and personal electronics are becoming commonplace, electricians are increasingly in demand to update and modernize the aging home.

Electrician Cost Per Hour and Guarantees

Licensed electricians can charge anywhere from $50 to $100 an hour depending on experience level, license type and complexity of the job. This does not include additional costs for parts or minimum trip fees ($25 to $74). An apprentice electrician could charge less than this for simple jobs.

It’s important to note that there are two hourly rates when it comes to most electricians. There is a difference between the rate the electrician gets paid and the rate the electrician will bill. Travel, supplies and overhead are sometimes included in the hourly rate, though some electricians provide a detailed line item bill with hourly rates separate from all other costs. This guide references what a licensed electrician will charge.

Most large companies don’t do small jobs like fixing a light. Some electricians will do “side work”, or work without the overhead of an electrical company. In these cases, you may be able to find electricians working at a slightly lower rate than a professional shop charges.

How to become an Electrician

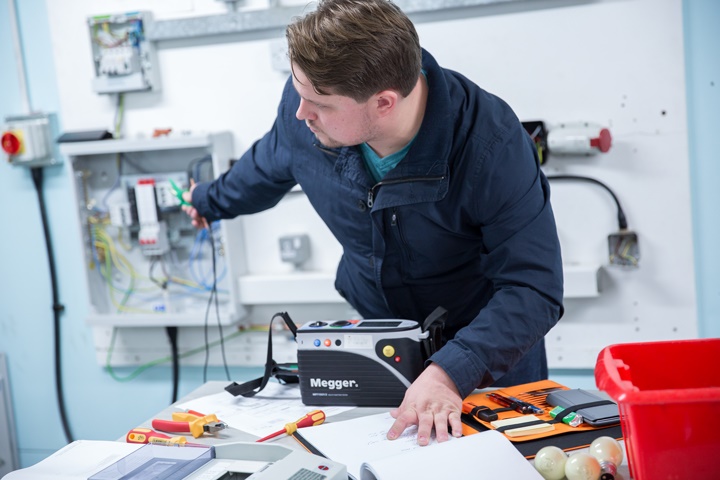
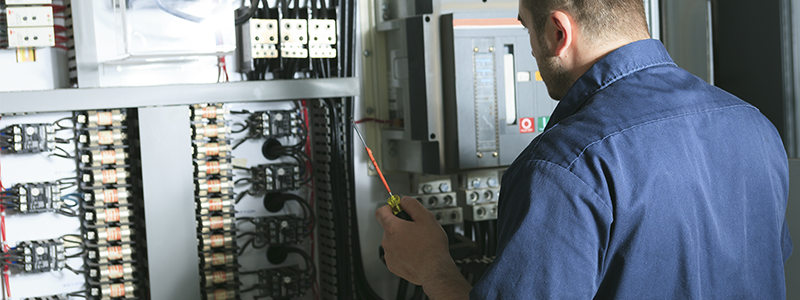
Electricians install, maintain, repair, test and commission electrical and electronic equipment and systems for industrial, commercial and domestic purposes. Electricians may also work on electrical transmission and distribution equipment.

Personal requirements for an Electrician

Enjoy mathematical and technical activities

Good hand-eye coordination

Good eyesight (may be corrected) and normal colour vision

Logical thinking and diagnostic ability

Aptitude for mechanics and electronics

Able to do precise and detailed work

Able to work independently or as part of a team

Able to cope with the physical demands of the job

Good communication skills

Education & Training for an Electrician

To become an electrician you usually have to complete an apprenticeship or traineeship. Entry requirements may vary, but employers generally require Year 10 and some may prefer Year 12.

Additional information

After completing your apprenticeship or traineeship, you will need to apply for a licence to perform electrical work from the relevant government department or authority in your state or territory.

So What Is A Home Inspection Exactly

A Seller’s Guide to Navigating the Home Inspection

In Every Inspection, There Are Stakes for Buyers and Sellers

Once the buyer has made, and you’ve accepted, the offer, your home will get the once-over from the buyer’s home inspector. The inspection is usually a contingency of the offer, meaning the buyer can back out based on serious problems discovered. The lender also expects an inspection to make sure it’s making a good investment. Makes sense, right?

Your agent will work with you to negotiate those requests. Don’t want to be responsible for a repair? (Maybe it’s best if the buyer has the fix made by their own contractor anyway.) Your agent may be able to negotiate a price credit with the buyer instead.

By the way, inspections aren’t necessarily a big, scary deal. Your agent will help advise you about repairs you need to make before the inspection. In fact, she may have made those recommendations to you even before you put the home on the market. And if you’ve been maintaining your home all along (and you have, right?), your punch list may be minimal.

In addition, back when you put the home on the market, you were required to disclose to buyers the home’s “material defects” — anything you know about the home that can either have a significant impact on the market value of the property or impair the safety of the house for occupants. Material defects tend to be big underlying problems, like foundation cracks, roof leaks, basement flooding, or termite infestation.

What a Home Inspection Covers Depends on the Home

Every home is different, so which items are checked during your property’s inspection may vary. But home inspectors typically look at the following areas during a basic inspection:

Plumbing systems

Electrical systems

Kitchen appliances

Heating, ventilating, and air conditioning (HVAC) equipment

Doors and windows

Attic insulation

Foundation and basement

Exterior (e.g., siding, paint, outdoor light fixtures)

Grounds

Home Inspection Checklist

The home inspection is one of the most important parts of the home-buying process. And it’s something homebuyers — especially first-time buyers — should take seriously. Avoiding mistakes in this process could help you save money (sometimes a lot of money) down the road.

When putting an offer on a house, you should be sure to include an inspection as a condition of the sale. Once the offer is accepted, you’ll want to hire a professional, qualified home inspector to go through a thorough home inspection checklist. This guide will help you make every bit of the inspection count.

Research the inspector.

Your realtor or real estate agent should be able to recommend reputable house inspectors. But you still need to do your own research to ensure you find an honest, reliable and experienced inspector.

Ask them questions about their background and length/type of experience. You should also check their credentials and understand what certifications your state requires for qualified inspectors. There are also two national organizations that require inspectors to adhere to ethics and professional standards in order to belong: the National Association of Home Inspectors

Show up to the house inspection.

Don’t just let your real estate agent handle the inspection process. Witness everything your inspector has to say firsthand during the walk-through. Plan for the inspection to take several hours — this is not something that you want to rush. Feel free to bring along a friend or family member for another set of eyes and ears.

Home Inspections

Home inspections are a critical part of the home buying and selling process. Failure to obtain a home inspection could potentially cost you a great deal of money and hassles in the long run. Uncover valuable tips on the importance of a home inspection and helpful links to a variety of professional home inspection organizations, plus useful information available to you from the National Association.

Questions to Ask a Home Inspector

Do you belong to a professional association?

Will your report meet all state requirements?

How experienced are you?

How do you keep your expertise up to date?

Do you focus on residential inspection?

Do you offer to do repairs or improvements?

How long will the inspection take?

How much?

Will I be able to attend the inspection?

Do you belong to a professional association?

There are many associations for home inspectors, but some groups confer questionable credentials or certifications in return for nothing more than a fee. Make sure the association your home inspector names is a reputable, nonprofit trade organization

Will your report meet all state requirements?

Also, make sure the organization complies with a well-recognized standard of practice and code of ethics, such as those adopted by the American Society of Home Inspectors or the National Association of Home Inspectors.

How experienced are you?

Ask inspectors how long they’ve been working in the field and how many inspections they’ve completed. Also ask for customer referrals. New inspectors may be highly qualified, but they should describe their training and indicate whether they work with a more experienced partner.

How do you keep your expertise up to date?

Inspectors’ commitment to continuing training is a good measure of their professionalism and service. Advanced knowledge is especially important with older homes or those with unique elements requiring additional or updated training.

What Buyers Should Ask After a Home Inspection

After an inspector has finished a home report, buyers may feel overwhelmed by any flaws that might have been found. That’s why it’s important they take the opportunity to learn more so that they can move forward confidently in the transaction.

recommends home buyers ask their inspector clarifying questions like: “I don’t understand this; what does it mean?” or “Is this a major or minor problem?” and “Do I need to call in another expert for a follow-up?”

Home inspectors are bound to uncover something in a home; no home is perfect. But the majority of the problems they uncover will likely be minor. Have the home inspector clarify which problems fall within the “minor” or “major” categories.

If the inspector identifies a potentially major problem, consumers will want to follow up whether they should call an additional expert in to investigate further. For example, consumers may need to bring in an electrician to take a closer look at potential electrical issues that were flagged or a roofer if a roofing problem is suspected. Those specialists can then give an idea of the cost to fix it, which the real estate agent can take to the seller to request a concession, if the seller doesn’t want to fix it prior to the sale.

How to Handle Home Inspection Hurdles Brought on By Coronavirus

As coronavirus complicates the real estate business in many ways, home inspections are one step that may be putting a monkey wrench in your transactions.

Here’s the trouble: Sellers are naturally uncertain about allowing anyone — inspectors included — inside their homes. Furthermore, stay-at-home orders can make it difficult, if not impossible, to meet contractual obligations related to home inspections and repairs on a certain timeline. And the choice to ignore these orders can result in fines, delays, stressed-out clients, and more.

The landscape is rapidly changing with coronavirus, and one thing that’s for sure is that nearly everyone must adapt. This includes how to approach home inspections, especially since they are traditionally the most common contract contingency. In this article, we ask three experienced agents to give tips on how to handle home inspections during coronavirus, in a way that benefits everyone involved.

Get familiar with local ordinances related to coronavirus

The first consideration is awareness of your specific state’s stay-at-home-order (or lack thereof). These orders constantly change from day-to-day. Real estate is an essential business in some states but not in others. It becomes more complex when some metro areas consider real estate essential but other metros in the same state do not.

Furthermore, each state’s government website has information regarding essential businesses. You might find this in the form of a press release or a set of listed criteria. It differs from state to state.

Water Testing Methods: Measuring Conductivity Levels In Fluids

Pool Water Testing

Safe, healthy water. It’s what we all want most when it comes to our pools and spas.

Regularly testing your water is an essential part of maintaining your pool’s welfare. Getting an accurate reading of your water chemistry helps you understand exactly how much of what product your pool needs. Testing your pool water prevents the possibility of under-treating or over-treating the water, which keeps your pool properly balanced and saves you money!

Let’s go over a few of the basics when it comes to properly testing your pool’s water. There are two ways to test your pool water — at home or in-store.

At-Home Pool Water Testing

Leslie’s offers several options you can use at home, including test kits and test strips. Testing at home is easy, but there are a few things you need to know before getting started. Which type of test will work best for you? Let’s take a quick look at the pros and cons of each:

Liquid Test Kits

PROS

  • Most accurate type of water test. Liquid DPD reagents are the best for testing chlorine levels in your pool
  • Testing available for more diverse aspects of water chemistry
  • This method is used by pool professionals and health departments

CONS

  • Most expensive water test
  • Testing process can take longer and be more complicated than test strips
  • Reagent bottles must be held vertically to ensure uniform drop size, and drops must be counted as they’re slowly added
  • More prone to user-error

Test Strips

PROS

  • Fastest water test
  • Simple to use and read
  • Least expensive to purchase
  • Most popular option for pool owners wanting a quick, daily pool chemistry analysis

CONS

  • Fewer options for testing capabilities
  • Not as accurate or precise as a liquid test kit
  • Some results take just a few seconds to develop, and some take longer; for tests with multiple results on the same strip, it’s important to understand the timing so you don’t get inaccurate results
  • Hands must be completely dry when removing the strip from the container

Special Tests

Standard test kits will accurately test for the four or five principal tests most homeowners need. There are also specialty tests that can be conducted in certain circumstances:

  • Biguanide water treatment systems, found on some swimming pools, require biguanide test strips to check the sanitizer levels, pool pH, alkalinity, and calcium hardness levels.
  • Test for salt on saltwater pools using a salt test strip. if you use a salt-chlorine generator, you will also need to test for chlorine.
  • Phosphates can be tested using a phosphate test kit. Phosphate can enter a pool from a variety of sources, such as lawn fertilizers, and they can lead to algae that feed on the phosphates.
  • If pool water stains the surface of your pool, you can test for metals such as copper or iron using special test strips designed for the purpose.
  • Chloramines (combined chlorine) can be tested with a DPD test kit. ShockCheck test strips can tell you when shocking is needed to remove chloramine.
  • TDS (total dissolved solids) can be tested with a SafeDip test meter.

Why Testing Your Pool Water Is Important

Your pool, while it looks like a pond, is more of a chemistry lab. The chemicals in your pool can either keep it clean or make it potentially dangerous. Testing your water is the only way to know for sure what those invisible chemicals are doing in your water.

You need to test your water often. While it might seem like a hassle, it’s a good thing! The better balanced your water, the less cleaning and water changing.

When and How Often to Test Your Pool

You can test pool water yourself, but if you don’t feel super comfortable doing that, you can also take a sample in for professional testing when you open and close your pool. A second set of eyes keeps it safe and clean. On the whole, you should be testing your pool at least once a month in addition to when you open and close it for the season.

Regular testing is essential for your chlorine, alkalinity, and pH levels. It’s so significant, the CDC calls chlorine and pH your “disinfecting team.” The minimum testing schedule for pH and chlorine is weekly, starting before you open your pool.

There are other times that you should test for balanced levels though, including:

  • After a rainstorm
  • After large groups have used the pool
  • Before beginning any form of algae treatment (pH testing is mandatory here)
  • After changes in the weather
  • After adding water
  • Before you close your pool
  • If you notice any issues with your water, like cloudiness or color changes

Pool-water chemical levels to test and balance

The four chemical levels critical to healthy water are free chlorine, calcium hardness, pH, and total alkalinity. Along with cyanuric acid (a type of water conditioner sometimes referred to as “sunblock for pool water”), these compounds work in unison, and having each at the right level helps deliver sparkling, swim-ready water.

If water analysis indicates that one or more chemical levels are too high or too low, the message is to take action. With the water readings, you will know to add products like chlorine, muriatic acid, sodium bicarbonate, or other pool treatments.

Sources of contamination in swimming pools

Potential sources of microbes in your pool may include:

  • People swimming in the pool – this is the main source of microbes.
  • Animals, such as dogs – some pets like to paddle in the pool on hot days.
  • Dead wildlife – for example, frogs, lizards or insects may occasionally drown in your pool.
  • Debris from around the property, such as leaves, grass and dust.

Well Water Testing Reveals The Truth

How to Choose the Right Test Kit For Your Well Water

Your decision on what to test your water for should be based on the types of land use near your well and what your goals are for using your water such as domestic use, irrigation, agricultural or commercial uses.

Why Should I Test My Well Water?

Municipal city water systems test their water supplies regularly to ensure that the water is safe to drink.  As a well owner, you are responsible for making sure your well water is safe.

Most private wells provide a clean, safe supply of water.  Contaminants can, however, pollute private wells.  Unfortunately, you cannot see, smell, nor taste most of them. Consequently, you should test your well water on a regular basis.

Most Common Reasons for Testing

A common reason many folks want to test their water is to improve the aesthetic quality of the water and eliminate iron staining, white scale build-up, corrosion, and/or odors.

Should I Use a Certified Lab, or Do It Myself?

You definitely use a state certified laboratory if you need a test report for bank financing or when you first purchase your home.

The Best Water Quality Test Kit for Your Home

If you’re worried about your home’s water quality—as many Americans justifiably are, in the wake of water scares in Flint, Michigan, and Newark, New Jersey—a home water quality test can ease your fears. After 50 hours of reporting, and after testing 11 different home water quality test kits, we’ve found that the SimpleWater Tap Score Advanced City Water Test is the best water quality test kit for your home. It measures a wide range of more than 100 potential contaminants and delivers the results in an easy-to-read, richly detailed report. If you’re worried only about lead, we recommend the much cheaper Safe Home Do-It-Yourself Lead in Drinking Water Test Kit.

The SimpleWater Tap Score Advanced City Water Test is a send-away kit: You take samples of your water, put them into a handful of bottles, and ship them off (using an included mailing label) to a certified laboratory. There, your water is tested for more than 100 compounds, including metals such as lead, mercury, and arsenic; volatile organic compounds (VOCs) like chloroform; bacteria; and industrial and agricultural compounds like pesticides and nitrates. Tap Score is not the only highly accurate send-away kit, but no other kit we tested delivered nearly as useful a report. Tap Score not only tells you, in plain language, exactly which compounds are in your water (and the amount) but also explains their potential health risks and suggests ways of addressing any concerns. Tap Score also offers unmatched online support. You can chat with a representative, and if your questions go beyond their knowledge, the questions are passed on to experts, who follow up with a detailed email. All of this makes Tap Score by far the most user-friendly and informative home water quality test kit we found.

If for some reason you are unable to use Tap Score, we recommend two runners-up: the WaterCheck CityCheck Deluxe and the Safe Home Ultimate Drinking Water Test Kit. Like Tap Score, these are send-away kits; you put samples into bottles and ship them to a certified lab. We found that the testing was just as accurate as Tap Score’s (and, in fact, National Testing Laboratories, which makes the CityCheck Deluxe kit, is among the more than 60 labs Tap Score partners with). But both of these kits are more expensive than Tap Score, and their reports aren’t as easy to understand. The reports are still much more readable than those of some other send-away kits: They’re color-coded, so you can quickly see contaminant levels of concern. But they lack Tap Score’s clear explanations, actionable advice, and robust online support. The CityCheck kit also lacks an included mailing label, so you’ll have to take a trip to the post office or another shipper.

Our budget pick, the Safe Home Do-It-Yourself Lead in Drinking Water Test Kit, doesn’t have to be sent away—you can get the results at home yourself. It tests only for lead, but if that’s your sole concern, this DIY test is a great option. The Safe Home Do-It-Yourself kit is widely available, inexpensive, and fast (the test takes a total of 10 minutes and less than 30 seconds of active work). And it delivers a clear positive or negative result: Your lead levels are either below the EPA standard or above it. You simply dip a strip of test paper into a sample of your water, and the presence or absence of a blue line tells you whether you have a lead problem. If you don’t, you’ll have peace of mind. If you do, you’ll know it’s time to enlist a professional plumber or an environmental service to help you find and address the source of the problem.

BEST WATER QUALITY METERS AND TEST KITS FOR DRINKING WATER

It’s famous for having perhaps the poorest drinking water quality in a first world country. You literally cannot drink the water as the city’s pipe infrastructure is rooted which resulted in lead leaching from the pipes and eventually into its citizens directly

There’s no need to use a water meter in Flint because the water comes out rusty red and the locals have to make do with bottled water.

We state this to highlight that water quality is massively important – from keeping the human population healthy right through to testing river pollution though to making kombucha or homebrew beer (pH levels are super important), there are a million reasons why brewers,

Home testing kits and meters are great because you can get fairly instant results and you certainly do not have to send off samples to an expensive laboratory or testing company!

You want the damn thing to be accurate. And frankly, you probably want laboratory results accurate because ‘near enough’ doesn’t cut the mustard when we are talking about drinking water or swimming in it!

Drinking Water Testing

Many consumers want to test their well or municipal water for contaminants and impurities. Without having your water tested, it can be difficult to determine whether you actually need a water treatment system or what type of system would be best for you. Here are some factors to consider when testing your water and selecting a filtration product.

Finding a Laboratory

There are many laboratories that offer private well testing and many states that have water testing laboratories available. For a list of well testing laboratories, visit the Water Systems Council website. If you choose to search online, you may want to use the keywords “accredited” and “water” to find a water testing laboratory near you. Accredited laboratories have been independently evaluated as technically competent to provide accurate test data. Additionally, these accredited laboratories are not typically associated with any industry or manufacturer.

Collection of Water Samples

Once you locate a laboratory, follow the instructions on collecting the sample properly to obtain the most accurate results. For example, if you are collecting a water sample for lead or copper testing, the recommendation is to let the water sit overnight and take a “first draw” water sample – meaning fill the sample bottle from the kitchen tap prior to running any water for the day. A second example would be for a coliform bacteria sample. To collect this type of sample, remove any screen from the water faucet. There is typically a recommendation to run the water prior to filling the sample bottle. These samples need to be kept cold so you should take the sample directly to the post office or keep it in the refrigerator until it can be mailed in or dropped off. Remember to closely follow the instructions for each test you choose to have analyzed.

Water Testing and Results

It can be challenging to determine what type of testing to do on your well or municipal water and the costs can add up. It may be helpful to visit your local health department’s environmental health division to ask for information on what has been typically found in groundwater in your area

Water Filters and Treatment Systems

In the last decade, interest in home drinking water treatment products has grown tremendously. Unfortunately, it isn’t always easy to know whether a particular product is as safe and effective as the manufacturer claims at reducing various contaminants in your drinking water. Should you choose to add a water filter to your home, it is important to look for filters and treatment systems with the NSF mark. NSF International certified products are your key to making sure they meet strict standards for public health protection. For more information on choosing a home water filtration system

How to test the quality of Open Water for bathing or swimming

There is always a greater risk of infection or illness caused by microorganisms when swimming in open water (lakes, rivers etc) compared to a chemically treated swimming pool. This guide aims to help identify most appropriate water quality monitoring and testing (Please note, our recommendations are only suggestions

Below you find a general summary of the guidelines in the United Kingdom (UK), which follows similar guidelines to the EU. In addition to this, please make sure that you always check your local guidelines to make sure that everyone is safe. If you plan to open your water to the general public you must strictly adhere to the guidelines set by the EU and UK, therefore please refer to the official guidelines.

How often should I check the water: It is recommended to check the quality of the water regularly, ideally at the start of the bathing season, every 4 weeks, before any event, when there are visible changes to the water, after heavy rainfall as well as at the end of the bathing season. The pH should be monitored more often as it can be an early indicator of changes, because it is affected by algal and weed growth, agricultural run-off as well as waste water from industry.

How to take a water sample: With the exception of algal blooms, samples should be taken 30cm below the water surface. Samples should be transported as soon as possible after collection in a cool box (we provide a cool box as well as ice packs) so that they arrive at the laboratory on the same day.

Sea water: This resource has primarily been created for water quality of inland waters, like lakes & rivers. Whilst the regulations may also cover sea water, our test strips & bacteria tests are not suitable to check salty sea water. To test marine/salt water